Installing Debian Linux 9 on Windows 10 with WSL

So you got Ubuntu installed on your Windows machine, but you’re more of a Debian person.  Well this post is for you.  (If you haven’t yet enabled WSL and got Ubuntu running, check out my Part 1 post walking through that!)

These steps will switch WSL to use Debian, but don’t worry, it’s easy to undo them and switch back to Ubuntu.  Please follow the steps carefully, as doing things out of order may cause it to fail.  There are many ways to do this, and sometimes I know I’m skipping some shortcuts, but I just want to make these instructions as simple to follow as possible.

Part 2: Transitioning WSL to Debian

  1. In your browser we must download the Debian docker image.  Go to https://hub.docker.com/_/debian/ and find the build you want.  As of this writing, the latest version is stretch.  Just look for the line that includes the word “latest”.  Click the link in that line.  Currently it says (stretch/Dockerfile).
  2. It should take you to a github page.  You need to go one level back from the dockerfile page to find the location of the actual image.  In this case, the link says “stretch”
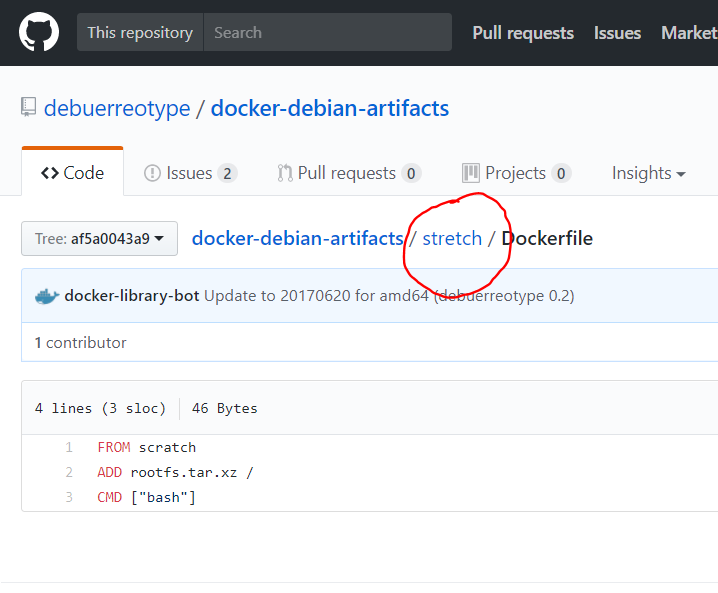
  3. Find the file that is named “rootfs.tar.xz” and click on it.  It should take you to the github page for this file, and click on the Download button.
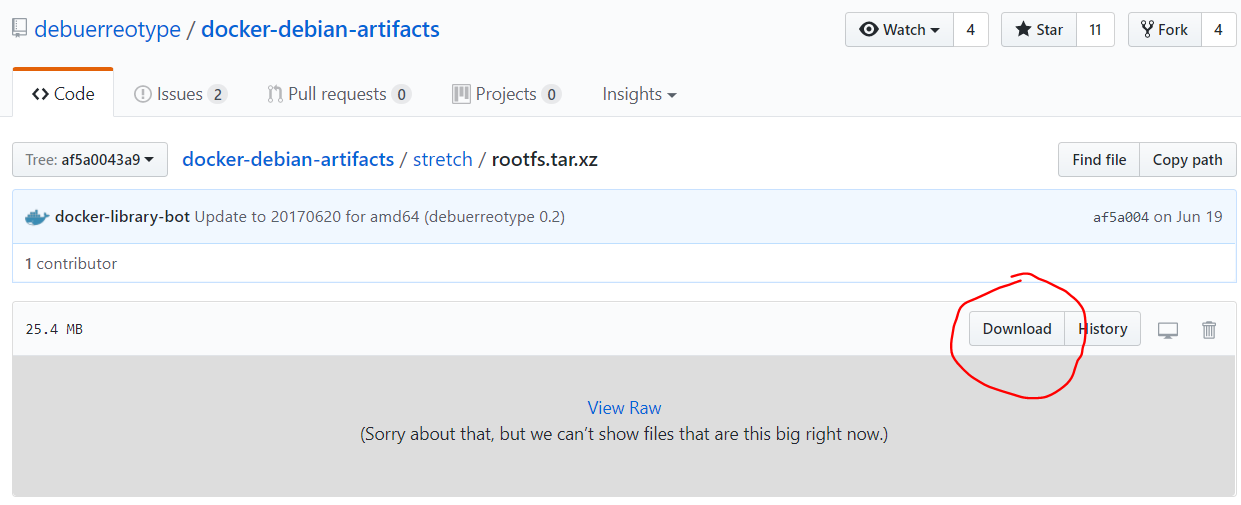
  4. Find where this file was downloaded to and take note of this location.  Usually it will be in your Downloads folder or your Desktop, depending on how your browser is set up.  Do not try to extract the file yet.
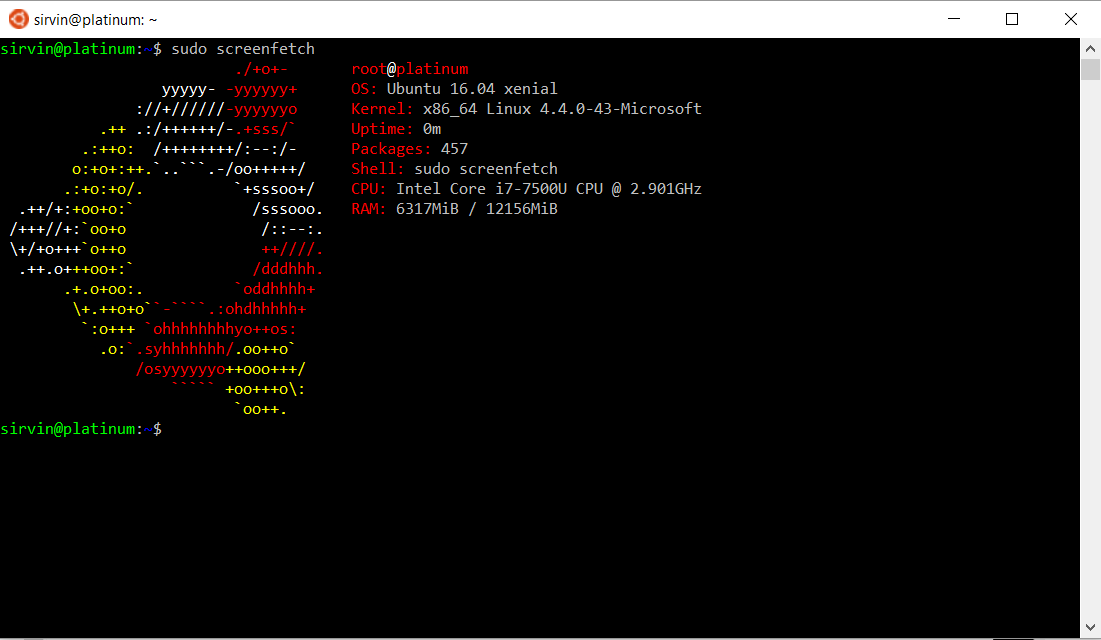
  5. Open your Ubuntu bash prompt (there should be a listing in your Start menu for Bash on Ubuntu on Windows)
  6. Create a folder to extract the archive to:
    cd ~
    sudo mkdir rootfs.debian
  7. Next we’re going to copy the image file to your home directory.  (not move in case we mess something up we still have the original).  You’ll need to substitute the Windows path where you had downloaded the archive to the Linux path name.
    Example: I downloaded to:
    “C:\Users\scott\Downloads\rootfs.tar.xz”
    so the path from within Linux is:
    /mnt/c/Users/scott/Downloads/rootfs.tar.xz
  8. So in my case the command would be (in case it’s hard to tell from the formatting, this is all one line, just a space before the ~):
     sudo cp /mnt/c/Users/scott/Downloads/rootfs.tar.xz ~/rootfs.debian/rootfs.tar.xz

    (NOTE: Linux is case sensitive, and make sure you use the correct slashes.  You can use tab when typing to complete some path names.)

  9. Extract the archive:
     cd ~/rootfs.debian
    
     sudo tar xf rootfs.tar.xz
  10. Exit the terminal by entering:
     exit
  11. Open any folder in Windows, clear out the path in the Address bar and type in: “%localappdata%\lxss” without quotes then hit enter.
  12. Click onto the rootfs folder and rename it to rootfs.ubuntu
  13. Open the home folder, then open your username folder and find rootfs.debian.  Right click on this folder and select “Cut”
  14. Go back to the lxss folder, then right click in the folder and select “Paste”
  15. Rename this folder to rootfs
  16. Since the user you had been using in Ubuntu is not set up in Debian, we must switch Debian to use the root account.  Open a Windows command prompt and type:
     lxrun /setdefaultuser
  17. When asked for the new Unix username, enter: root
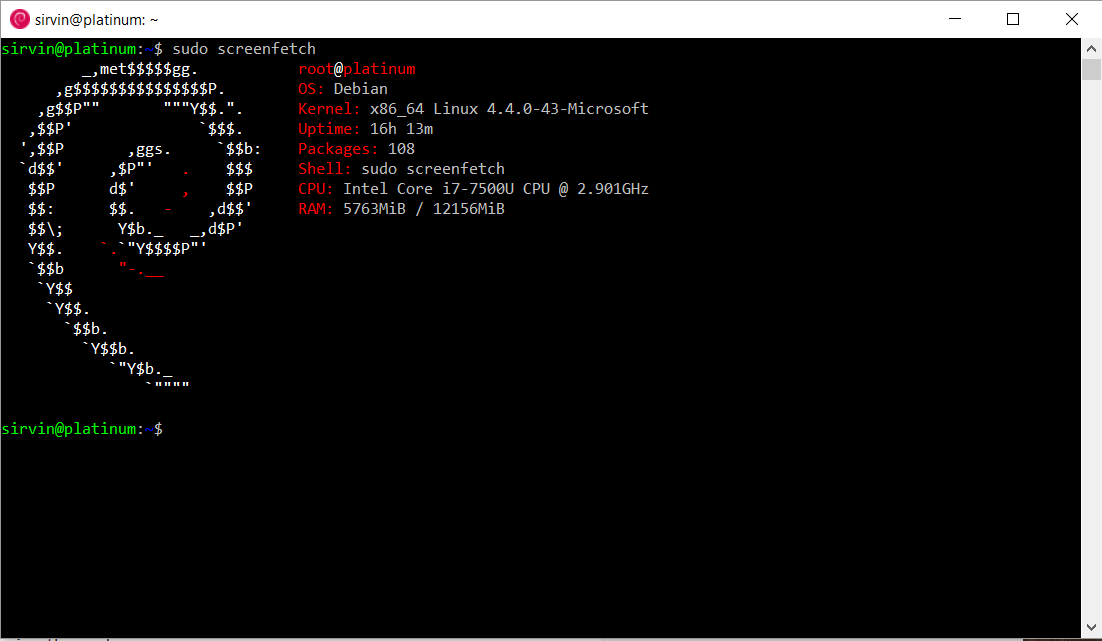
  18. Type bash then hit enter.  You are now in debian!  However, it’s pretty broken at this point, so keep reading!
  19. Set a root password by entering:
     passwd
  20. Get the latest list of available updates by entering:
     apt-get update
    
     apt-get upgrade

    Hit y to agree to prompts to install these updates.  You may notice some errors about your locale.  Let’s fix that.

  21. Run:
     apt-get install locales

    Once this is installed, run:

     dpkg-reconfigure locales

    Hit enter to go through the list of locales.  For Americans you can then enter en_US.UTF-8.  For other people, choose the appropriate language.
    When asked for the default locale, I just choose option 3.

  22. The ps command is missing, so let’s fix that:
     apt-get install -f procps
  23. Another thing that’s missing but helpful is the ability to extract .xz files, in case you need to do anything like this again from within Debian.  This command installs the xz utilities:
    apt-get install xz-utils
  24. You’re probably getting an error about resolving a hostname.  Take note of your computer’s name.  Then let’s install nano for a quick way to edit files in Linux.
     apt-get install nano
  25. Run nano to edit the hosts file
     nano /etc/hosts
  26. Beneath the line that says 127.0.0.1 localhost, add a line that says:
    127.0.0.1 hostname
    (filling in your computer’s name as the hostname).
  27. Hit CTRL-o then enter to save the file.  Then CTRL-x to exit nano.
  28. Install sudo so you can run as an account other than root:
     apt-get install sudo
  29. Add a new user substituting username for the username you’d like (no spaces allowed):
     useradd username -G sudo
  30. Set up a password for this account, putting in your actual username:
     passwd username
  31. Then exit.  You’re back at the dos prompt.  Now let’s tell WSL to launch as this new user instead of root:
     lxrun /setdefaultuser

    Then type in your new username.

  32. Test this out by typing bash.  You should be logged in as the new user.  To verify try typing the command:
    whoami
  33. Two last things that are optional.  You can change the shortcut in the start menu to now say Debian, and you can change the icon.
  34. Click Start, right click on “Bash on Ubuntu on Windows” then More -> Open File Location
    Rename this file to Bash on Debian on Windows
  35. Next in the path name type in: %localappdata%\lxss then hit enter.
    Rename the bash.ico to bash.ico.ubuntu.  If you’re not seeing the .ico extension, click the View tab up top and make sure “File name extensions” is checked.
    Download this icon and save it to the folder with the name bash.ico.
  36. That should be it!  It might take a reboot to get the icon updated everywhere on your system.

NOTES
if you want to undo this, assuming you used the same username for both Linuxes, all you need to do to have this launch Ubuntu is rename the rootfs folder to rootfs.debian and rename the rootfs.ubuntu folder back to rootfs.  And of course restore the old icon.

Installing Ubuntu Linux on Windows 10 with WSL (Windows Subsystem for Linux)

I’m a big Linux fan, been using it since 1999 when I first bought a Red Hat Linux for Dummies book which came with an install disk in the back.  Things have changed dramatically in the Linux world since then, maybe most dramatically in the fact that you can now install the bash shell in Windows 10.

In this blog post I’ll show you how to install WSL, which gives you a bash terminal running Ubuntu on your Windows 10 machine.  After that, look for Part 2 where I show you how to transition it to Debian 9!

Just a note: At the time I’m writing this, the current latest version of Windows 10 still hides a few of these options from the normal user.  I’ll give the steps as they are today, but in the future you may be able to skip a few steps.  For example, installing Ubuntu is going to be an option directly from the Windows Store, instead of going through the control panel steps.

Look for the store link for Ubuntu here:
https://www.microsoft.com/store/p/ubuntu/9nblggh4msv6

Also coming soon will be Windows Store packages for Fedora (no link yet), openSUSE and SLES!

What you need:

  • Windows 10
  • Internet Connection
  • A little bit of time

Part 1: Installing Ubuntu on WSL

  1.  Click start, and click the Cog icon to open the Windows Settings app.
  2.  Open “Update and Security”
  3.  On the left side open “For developers”
  4. Put a dot in “Developer Mode” (Note: this won’t be required in future updates of Windows, but currently still is)
  5. If it makes you reboot, go ahead and do that, then log back in.
  6. Click Start, type Control Panel and hit enter.
  7. Make sure the View By in  the upper right is Large or Small Icons, then open “Programs and Features”
  8. In the upper left click on “Turn Windows features on or off”
  9. Check the box for “Windows Subsystem for Linux (Beta)” then click OK.  It probably won’t say Beta in future updates.
  10. It should install some stuff and ask you to reboot.  Go ahead and do that.
  11. Next, open a command prompt (click Start -> type cmd and hit enter)
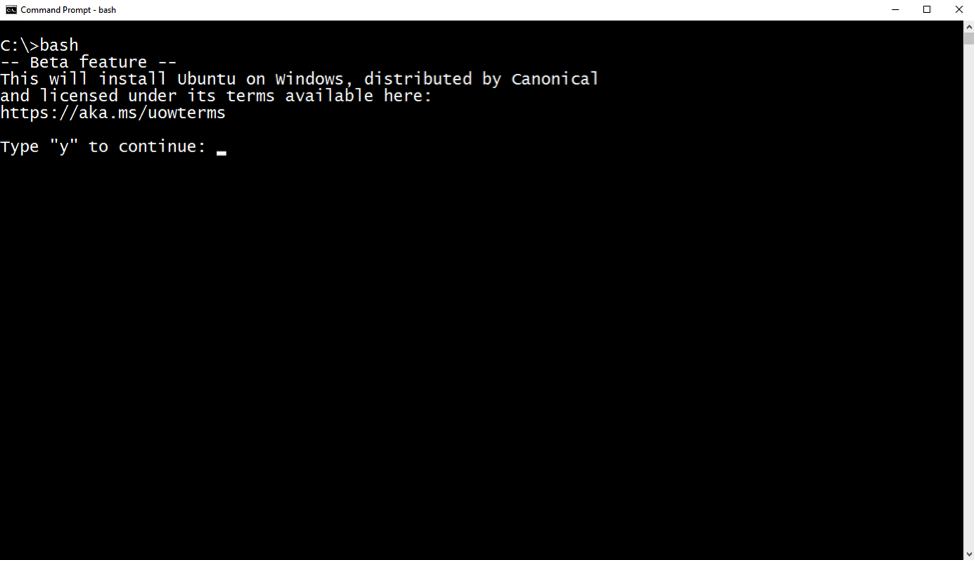
  12. At the command prompt type “bash” without the quotes, and hit enter.
  13. Type y to continue, and it should download and install a small Ubuntu image.
  14. It will ask for a new username, so enter a username (no spaces) and choose a password.
  15. It should bring up an ubuntu terminal.  Cool!
  16. Exit the Linux environment by typing exit then hitting enter.
  17. Enter exit again to close the Windows command prompt.

OK!  So by now you’ve got Linux available on your Windows computer!  You should have an icon for “Bash on Ubuntu on Windows” on your start menu to launch it, or you can bring up any command prompt or powershell and type bash to launch.  If you want, you can stop right here, and you can just use Ubuntu.

If you want to switch this over to Debian, read Part 2!

Ubuntu 9.04 Still Not Ready for Primetime

I’m a big Linux fan.  I’ve been using in some way or another since 1999 and wouldn’t consider myself a novice.  But despite all my efforts over the years, Linux is still unable to meet my needs as a desktop OS.  Now, I do use Linux regularly as a server at work, and it’s a rock solid beast.  But when it comes to the desktop, I find it wanting.

Take today’s release of Ubuntu 9.04 – Jaunty Jackelope.  I’ve been using it since beta, and it’s got a lot of good stuff going for it.  Boot time is excellent… around 26 seconds on my desktop.  After installing a few fonts from other sources (such as my beloved Futura, and my new favorite coding font, Droid Sans Mono from Google’s Android platform), it is simply gorgeous to look at.  Ubuntu has finally learned exactly how to properly display fonts.

But apart from the shiny exterior, and the admitedly stable structure that frames any UNIX based OS, is a slew of problems that prevent Ubuntu from taking over my desktop.  Multimedia support is a big problem.  After a few commands, I had all the gstreamer codecs installed from Medibuntu, vlc player and skype.  But everything is still such a cobbled-together mess.

Xvid files drop frames in vlc, even though I’ve got a system that should easily handle this type of stuff.  I can double-click the vlc window to make it full screen… but I must wait for 5-10 seconds as it slowly chugs away at this simple procedure.  (Simple in terms of how Windows and osx86 handle it the exact same procedure, on the exact same hardware, with the exact same version of VLC.)  If I open the same files in Totem, it’s hit or miss whether it will display anything at all, or will just be a black window.  I once full-screened the Totem window to have my entire X session hang.

Support for things such as webcams is also dreadfuly inept.  My Logitech webcam was detected immediately and “worked” to some extent.  Skype recongized a generic usb camera, and was able to display video.  However it only displayed a fraction of the actual camera image, a zoomed in corner of the view.  Skype, nor cheese, nor camorama, nor any other camera app I could find have any actual settings for this.    So unless I only wish to show a corner of my head, or mount my webcam 10 feet behind my monitor, this webcam is useless.

Media streaming?  Sorry there’s no orb support, nor any built-in media streaming ala Windows Media Center.  You can try Jinzora (which requires you to run a web server with MySQL databases on your PC [no thanks, I deal with that enough at work]) or open up the troubled VLC to stream.

I really want to love Ubuntu.  And I do have it installed on two old laptops here where I fuck around with perl and c++.  But as it stands, unfortunately it just does not meet my needs.  It’s sad that XP is still the best OS option I have.